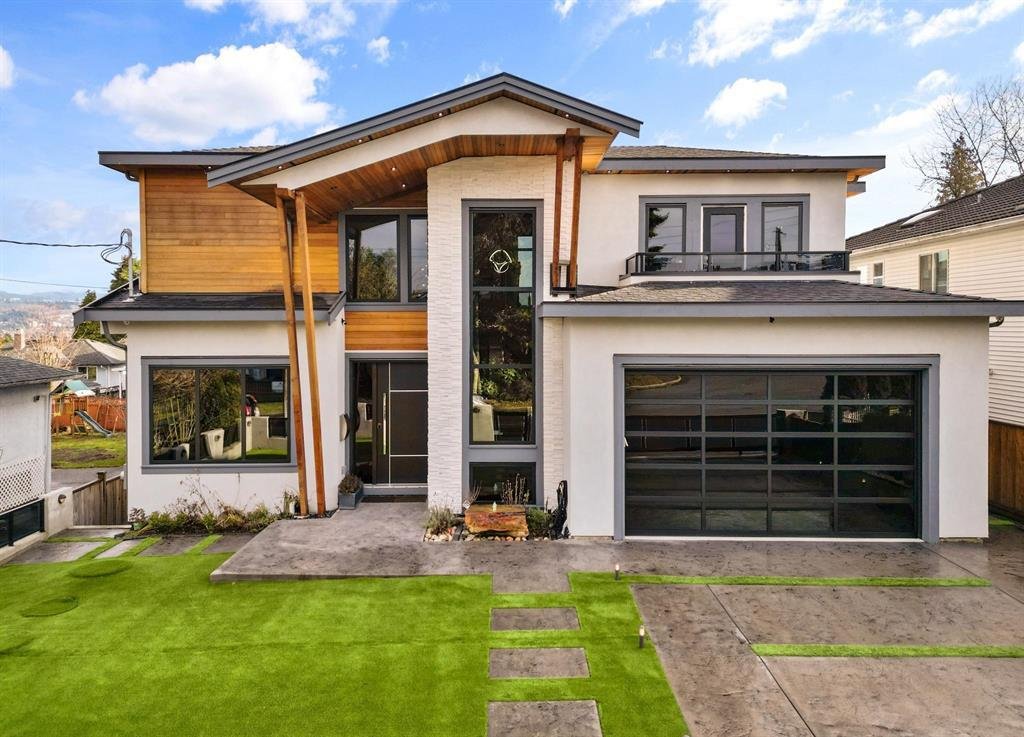
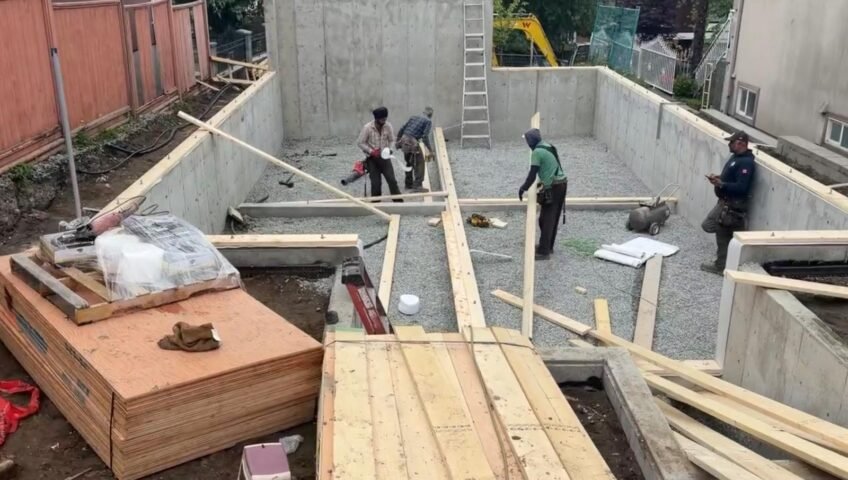

The reference for every Xerox Builders Part 9 project: every trade, inspection and professional, in build order. Left side: what happens on site now. Right side: what to prepare for the coming weeks.
Prefer paper? Download the magazine edition of this manual to read offline or print.
Please note: general information from our own experience, not professional, engineering or legal advice. Rules change, so always confirm with the City, your designer and your engineers. Full disclaimer
How to read the tags
- CITYCity of Vancouver inspection. Book it through your permit.
- ENGINEEREngineer field review. Get a written letter every time.
- HOLDStop. The next trade cannot start until this passes.
- THINK AHEADHire, select or order now so the next parts are not delayed.
Xerox Builders standards on every house: electric fireplaces; separate HRV ducts; an independent HVAC designer (not the installer); exterior gutters (not built-in); heat pump water heater; solar conduit to the roof and an EV charger circuit roughed in; leak sensors with an automatic main water shut-off; stiffer floors from the engineer; network pre-wire (data in every bedroom, ceiling Wi-Fi points, network cabinet, outside camera wiring); windows as the energy model says; wall type and roof material chosen per house; mineral wool batt insulation; Schluter Kerdi shower waterproofing; curbless shower in the primary bathroom; synthetic roof underlay with ice-and-water membrane at eaves, valleys and walls; low- or zero-VOC interior paint; best-level floor sound system on all upper floors (sound mat + gypsum concrete topping + approved acoustic underlay under the finished floor); interconnected smoke and CO alarms to code; garage with insulated door, floor drain, opener with battery backup and extra outlets with a workbench circuit; written site-specific safety plan; weekly site photos in a shared folder; professional final clean; final walk-through with the owner at handover; Xerox Builders sign on every site; fixed prices with all trips included; trades take instructions only from Xerox Builders.
Golden rule: never cover any work until its inspection or review has passed. Keep approved drawings on site for every inspection.
Contents
- Planning notes
- Pre-construction
- Site prep and demolition
- Excavation and shoring
- Footings
- Foundation walls and drain tile
- Framing the structure
- Dry-in and sheathing inspection
- Basement slab
- Back framing and drops
- Rough-ins
- Framing repairs and inspection
- Insulation and air sealing
- Sound ceiling and drywall
- Exterior finishes
- Interior finishes
- Site works
- Finals and occupancy
- Professionals and trades
- Inspection checklist
Planning and Your Team
The video for the next part of this manual.
Planning notes
From the first talk with the homeowner to the demolition day.
Builder’s notes
Design talks with the homeowner
- Stack upper walls over lower walls. Offsets and cantilevers mean more beams, more cost and soffit problems.
- Avoid living space over a deck, or a deck over living space. If he wants it, plan the fire separation, insulation, waterproofing, slope and drains now.
- A deck over living space is a roof: membrane, slope, drains, insulation and guard height.
- Deck edge feature: a deep deck fascia (3–5 layers of 2×4 built out, clad in James Hardie trim with a drip edge) looks great and stops rain streaks. Show it on the elevations now.
- In-wall (wall-hung) toilets: decide now; they need deeper walls and carriers.
- Special rooms decided now: home theater, gym, storage room, mudroom lockers. They change walls, ceilings, backing, ducts and wiring.
- Basement ceiling sound and footstep noise: ask the structural engineer for a stiffer floor over the basement (deeper joists, closer spacing, thicker glued subfloor).
- Upper floors, best sound level (company standard): sound mat plus gypsum concrete topping on every upper floor. The engineer designs for the extra weight; the designer adds the extra floor height (about 1–1.5 inches) to stairs, door thresholds and ceiling heights. Upper-floor radiant tubing can go inside the topping.
- Stack bathrooms and kitchens; leave room for ducts, pipes, chases and bulkheads.
- Decide early: secondary suite or not, laneway house, radiant, heat pump, sprinklers.
- Keep window sizes standard where possible.
- Confirm every change in writing (email) and keep a change log.
Meeting with the structural engineer
- Prefer wood beams (LVL, glulam) over steel where possible.
- One final choice for joists, beams and posts. No alternates.
- Joists that leave room for ducts and pipes.
- Review every cantilever, offset floor and deck over living space; ask for the simplest detail.
- Fewest shear walls and hold-downs; clear nailing schedules.
- Get his list of required field reviews in writing, with his fee per visit. Call him only for those. Track them in the ledger (Professionals section).
- Make sure he coordinates with the geotech on soil bearing.
Hazmat
- Hire the hazmat Qualified Professional (QP) early, while the design is in progress.
- Salvage and Abatement permit before removal; QP’s final reports before the demolition permit.
Services
- Remove all services as soon as possible: FortisBC gas, BC Hydro, City water and sewer.
- One BC Hydro application: disconnect the house AND temporary power on a post.
- Electrician gets the electrical permit and installs the post early, ready for Hydro.
- Plumber sets up temporary water by hose before the house water is cut.
Permits and timing
- Building permit in hand before demolition. No gap between demolition and excavation, so no open pit filling with rain.
- Check the City’s recycling rules for demolition of older houses.
Questions for the demolition and excavation contractor
- How will you take it down? What machines, and how many days?
- Recycling plan and receipts for the City.
- Dust control and protection of trees, neighbours and sidewalk.
- Old foundation and footings fully removed?
- Truck route and street parking.
- Insurance and WorkSafeBC clearance letter.
- Who checks the services are capped before you start?
Pre-construction
Finish every decision on paper before the first shovel.
On site / in the office now
- Surveyor first, before the designer: topographic and legal survey, the base for the site plan.
- Design team: designer or architect, geotechnical engineer, structural engineer, energy advisor, arborist, mechanical and radiant designer, sprinkler designer.
- Engineers give one final choice: joists, beams (steel or wood), shear walls, slab reinforcement. No open options left for framing.
- Permits: demolition, building, plumbing and gas, electrical, sprinkler, tree, sewer and water connection.
- Schedule B letters (assurance of design) from every engineer before the permit is issued.
- Energy advisor: energy model with Step 4–5 targets in writing; building envelope and air barrier strategy decided (see Professionals).
- Rainwater management: required for most new low-density homes in Vancouver since July 1, 2025. Choose the system (detention tank, harvesting tank, green roof or landscape feature) and show it on the permit drawings. Questions: rainwater@vancouver.ca.
- Home warranty enrolment, builder’s risk insurance, WorkSafeBC clearance letters from every trade.
- Site-specific safety plan written for this project (WorkSafeBC); shared folder set up for weekly site photos.
- Budget, contracts, deposits and a full trade list.
Site Prep to Foundation
The video for the next part of this manual.
Site prep and demolition
Make the lot safe, protected and ready to dig.
On site now
- Hazmat Qualified Professional (QP) inspects the house; his signed QP Declaration goes in with the demolition permit application.
- CITYSalvage and Abatement permit (houses built before 1990) before any removal starts. HOLD
- Licensed abatement contractor removes the materials following the QP’s report; QP does the post-abatement inspection and signs the final reports. The City accepts them before the demolition permit is issued.
- Remove services as soon as possible: FortisBC gas, BC Hydro, City water and sewer (disconnected and capped).
- Temporary power on a post (requested with the Hydro disconnection; electrician installs the post) and temporary water by hose from the City connection (plumber, before the house water is cut). Abatement and demolition run on these.
- Before the demolition crew arrives: toilet, site fence, tree protection fencing, permit board, erosion and sediment control.
- CITY Tree protection / site protection check, where your permit requires it. HOLD
- Demolition and hauling. Keep recycling receipts.
Excavation and shoring
Dig to the right depth on good bearing soil.
On site now
- Surveyor stakes the corners and sets the elevation benchmark.
- Excavator digs to the depth on the drawings. Keep the bottom dry and undisturbed.
- Shoring contractor, if required, with its own engineer.
- ENGINEER Geotech reviews the excavation bottom and bearing soil.
- HOLD No footing forms before the geotech accepts the soil.
Footings
Forms and rebar checked twice before concrete.
On site now
- Surveyor: footing layout and elevations.
- Forming crew: footing forms, keyways, step footings.
- Rebar installer: rebar on chairs, laps and cover per the drawings; dowels for walls.
- Electrician: grounding electrode in the footing, if used.
- ENGINEER Structural engineer reviews the rebar.
- CITY Footings and Forms Inspection.
- HOLD No pour before both pass. Keep the concrete delivery tickets.
Foundation walls and drain tile
Walls, waterproofing and drainage before backfill.
On site now
- Wall forms, rebar, anchor bolts and hold-down anchors exactly as drawn.
- ENGINEER Structural engineer reviews wall rebar and anchors.
- CITY Wall Forms Inspection. HOLD
- Pour and strip. Surveyor does the foundation location and elevation survey.
- Damp-proofing outside; exterior insulation if on the drawings.
- Plumber: perimeter drain tile, drain rock, filter cloth, connection to storm or sump.
- CITY Drain tile inspection before it is covered (confirm timing with your inspector).
- Backfill in compacted layers, only after the main floor deck is framed or the walls are braced.
Framing and Envelope
The video for the next part of this manual.
Framing the structure
The basement slab waits until the house is dried in.
On site now
- Sill gasket and sill plates on the anchor bolts.
- Floors: joists or I-joists, beams, posts, subfloor glued and nailed.
- Walls: studs, headers, shear walls with the exact nailing pattern, hold-downs.
- Stairs, fire blocking, backing for cabinets, grab bars, TV and handrails.
- Roof: trusses per the supplier’s layout (keep their engineering), roof sheathing.
- Surveyor: height survey when the roof framing is done, before roofing, so any problem can still be fixed. Keep the report for the inspector.
- Protect the deck from rain; keep the site clean.
Dry-in and sheathing inspection
Close the house against rain fast, especially October to April.
On site now
- Roofer: roof underlay right after roof sheathing.
- Wall sheathing complete; one window mock-up with flashings and trim.
- ENGINEER Structural engineer sees shear wall nailing before the membrane. Book an early visit, or hold the membrane until the engineer’s single visit (dry season only).
- CITY Sheathing Inspection.
- HOLD No sheathing membrane or cladding before it passes.
- Sheathing membrane, then framer installs windows and exterior doors with sill pans and air sealing; cladding trade does the head flashings.
Slab and House Systems
The video for the next part of this manual.
Basement slab
Every layer is checked before the next one covers it.
On site now
- Plumber: under-slab drains, sump if any, and the radon pipe: from under the slab up through the house, labelled, capped, with space left for a future fan.
- CITY Below Slab Plumbing Inspection, pipes under test. HOLD
- Gravel in layers, compacted.
- ENGINEER Geotech compaction review, with test results and letter. HOLD
- Rigid foam (thickness per energy drawings) and slab-edge insulation.
- Poly 6 mil (0.15 mm): 300 mm laps, taped, sealed to walls and around every pipe. It is also the radon barrier.
- Mesh on chairs, about 1½–2 inches high. Never flat on the foam.
- Radiant tubing clipped or tied, spacing per design, under pressure test.
- ENGINEER Structural engineer reviews the mesh or rebar only if the slab is on his drawings. Foam, poly and radiant are checked by the City, not the engineer.
- CITY In-Slab Hydronic Heating Inspection. HOLD
- Photograph the tubing, then pour with the radiant still under pressure.
Back framing and drops
Drops are framed before the electrician starts.
On site now
- Site walk with framer, plumber, HVAC, sprinkler and electrician. Mark every pipe, duct and HRV route.
- Runs that cannot pass through joists go in a drop or bulkhead.
- Framer: basement walls on the slab (treated bottom plate with sill gasket), drops, bulkheads, soffits, closets, niches, extra backing.
- Mark the final ceiling height in each room so the electrician sets boxes at the right depth.
- Then call the trades for rough-ins.
Rough-ins
Biggest pipes first, wires last.
On site now
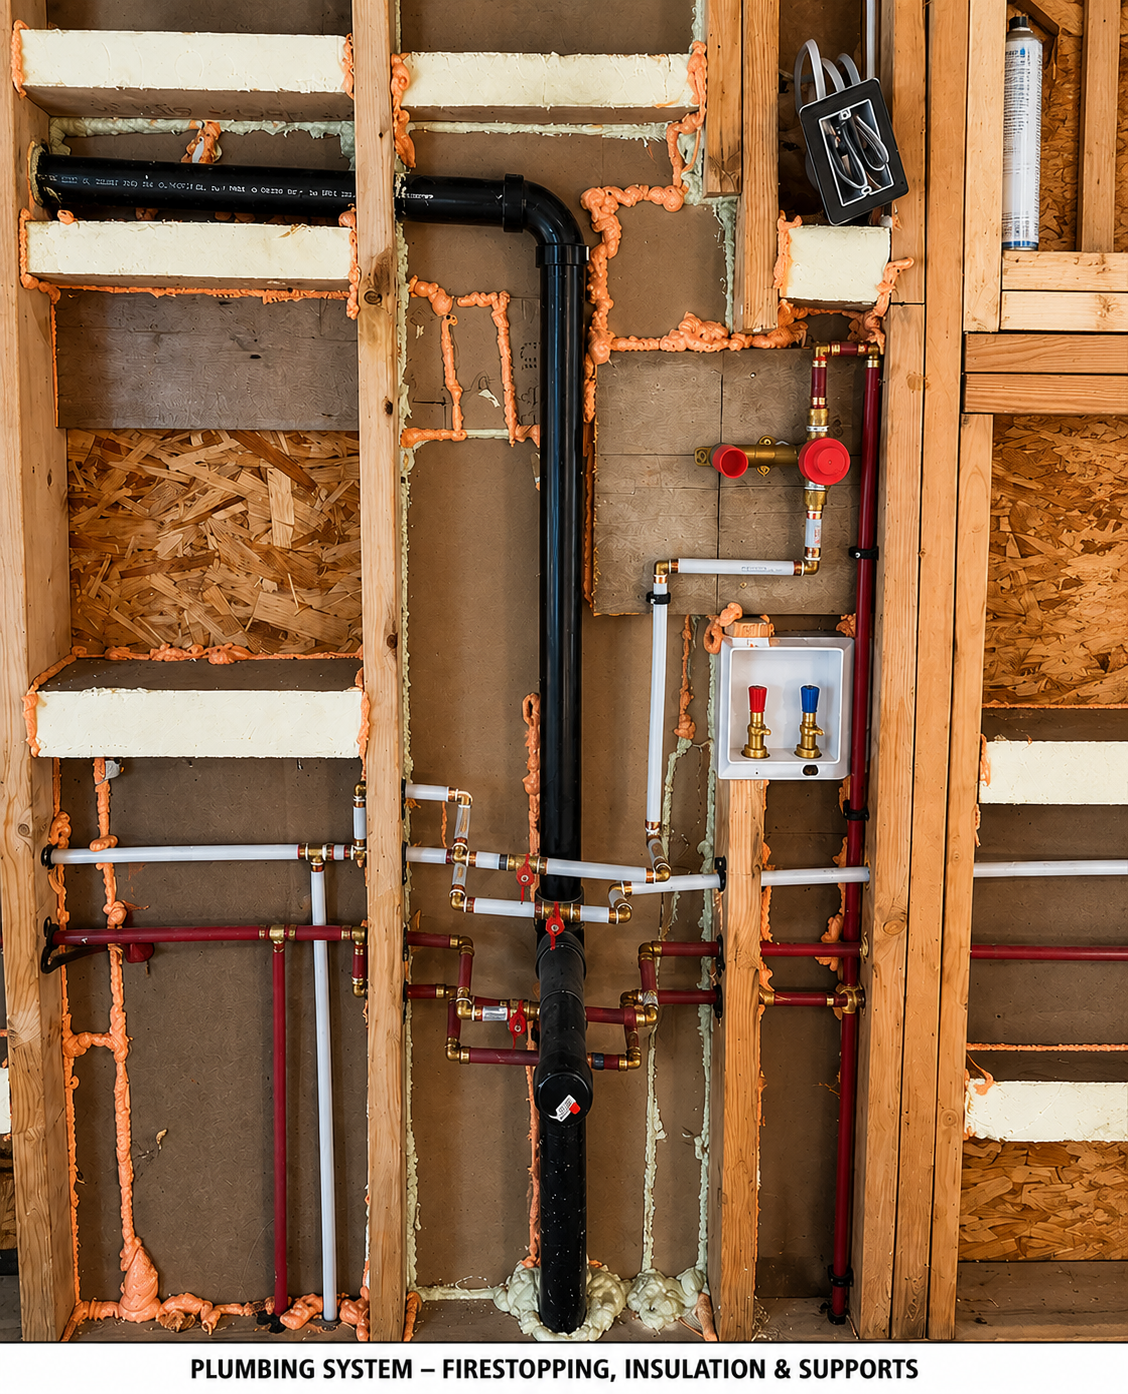
- Plumber: drains, vents, water lines, tub and shower valves, under test.
- Gas fitter (if gas): lines and test.
- HVAC: heat pump line sets, ducts, HRV, bath and range hood exhausts, radiant manifold.
- Sprinkler installer: pipes and head locations.
- Electrician: panel, boxes at final depth, wiring, low voltage, solar and EV rough-in.
- Nail plates where pipes or wires are closer than 1¼ inch to the stud face.
- CITY Rough-in plumbing, gas, mechanical and sprinkler inspections.
- CITY Rough electrical inspection.
- HOLD Framing repairs and the framing inspection wait until all rough-ins pass.
Airtight, Quiet and Safe
The video for the next part of this manual.
Framing repairs and inspection
Fix the cuts, then engineer, then City.
On site now
- Framer walk-through: fix every cut joist, stud, plate and beam. Engineered parts (I-joists, LVL, trusses) only per the engineer’s or manufacturer’s detail.
- Strapping over cut top plates, missing blocking, fire blocking between floors.
- Retighten all hold-downs (wood shrinks).
- ENGINEER Structural framing review and letter. HOLD
- CITY Framing Inspection. HOLD No insulation before it passes.
Insulation and air sealing
Airtight now means a passed blower door test later.
On site now
- Air seal plates, rim joists, window and door gaps, every hole through outside walls and ceiling.
- Insulation: mineral wool batts in walls; rim joists, attic or roof per energy drawings.
- Sound insulation in the ground-floor ceiling at the same time.
- Vapour barrier sealed with acoustic sealant and tape; airtight boxes at outside walls.
- Energy advisor: mid-construction blower door test. Fix leaks now.
- CITY Insulation and Vapour Barrier Inspection. HOLD No drywall before it passes.
Sound ceiling and drywall
One screw into a joist kills the sound benefit.
On site now
- Ground-floor ceiling, from joists down: sound insulation → sound panel → resilient channel → drywall. Exact layer order and products: to decide together.
- Follow the manufacturer’s tested assembly; channel at the listed spacing, right way up.
- Drywall screws into the channel only, never into a joist.
- Drywall about ¼ inch off the walls; acoustic sealant in the gap.
- Seal every light and penetration with acoustic sealant or putty pads.
- Drops and bulkheads get the same assembly.
- Drywall: ceilings first; mould-resistant board in bathrooms; Schluter Kerdi board or approved backer in showers. Tape, mud, sand, prime.
If the ground floor is a secondary suite, this ceiling is also a fire separation and must match the permit drawings exactly.
Finishing to Handover
The video for the next part of this manual.
Exterior finishes
Runs at the same time as the inside work.
On site now
- Rainscreen strapping; flashings over every window and penetration.
- Cladding: siding, stucco, stone or panels.
- Final roofing, soffits, fascia, gutters and downspouts to storm.
- Decks, railings, exterior stairs, garage door.
- Exterior caulking and painting.
Interior finishes
Protect finished work as you go.
On site now
- Painter: primer and first coat.
- Cabinets, then countertop templating and install.
- Tile: shower waterproofing first, then backsplash and floors.
- Flooring, protected right away.
- Finish carpenter: doors, trim, stairs and railings, closets.
- Plumber, electrician, HVAC and sprinkler finishing.
- Appliances, shower glass, mirrors, hardware.
- Final paint (low- or zero-VOC), touch-ups, and a professional final clean.
- Upper floors: gypsum concrete topping cured and dry (moisture tested) before the acoustic underlay and finished floor go down.
Site works
Water flows away from the house.
On site now
- Final grading sloping away from the house; required soil clearance below cladding.
- Rainwater tank (if not already in): installed, connected to storm, inspected before backfill; access lid kept clear and reachable.
- Driveway, walkways, patios.
- Fencing and retaining walls.
- Landscaping as the owner decides, plus replacement trees per the tree permit. Irrigation only if the owner pays for it.
- City crossing, boulevard and sidewalk work if required.
Finals and occupancy
Nobody moves in before the Occupancy Permit.
On site now
- Energy advisor: final blower door test (City notified first).
- CITY Final plumbing, mechanical, drain tile, sprinkler and gas.
- CITY Final electrical.
- ENGINEER Schedule C-B letters from geotech, structural, mechanical, sprinkler.
- Paperwork: final survey, energy report, sprinkler certificate, warranty confirmation.
- CITY Final Building Inspection → Occupancy Permit.
Bonus: Running the Job
The video for the next part of this manual.
Professionals and trades
One checklist for every professional and trade. More are added as we discuss them.
Surveyor (BCLS)
First on the job, back at every layout stage.
Before design
- Topographic and legal survey: property lines, corner elevations, trees with sizes, existing house, neighbours’ buildings near the lines, services, easements on title.
- Site plan base and grades for the designer’s height and floor area calculations.
- Check whether the City’s Engineering department must issue building grades.
During construction
- Property line pins marked or replaced before demolition.
- Excavation layout: offset stakes.
- Footing and house layout: corners and elevation benchmark.
- Garage or laneway house layout.
- Form or foundation location survey, if the permit or inspector asks.
- Height survey when roof framing is done, before roofing.
At the end
- Final location survey (as-built), if needed for occupancy.
Book each visit a week ahead. Use one surveyor for the whole job. Keep every report in the project folder.
Hazmat Qualified Professional (QP)
CIH, ROH, CSP or CRSP. Signs the hazmat reports.
- Hire early, while the design is in progress.
- Hazardous materials inspection of the house.
- Signed and sealed QP Declaration, submitted with the demolition permit application.
- Salvage and Abatement permit issued before any removal (houses built before 1990).
- Licensed abatement contractor removes materials following the QP’s report.
- QP does the post-abatement inspection.
- QP signs the Hazardous Building Materials Report Form plus the WorkSafeBC inspection and post-abatement reports. The City accepts them, then issues the demolition permit.
Source: City of Vancouver Salvage and Abatement permit requirements.
Structural engineer
Reviews only what is on his structural drawings.
At the first meeting
- Get his list of required field reviews in writing, with his fee per visit.
- Agree he is called only for those items.
- Schedule B before the building permit.
Typical field reviews
- Footing rebar.
- Foundation wall rebar, anchor bolts and hold-down anchors.
- Slab reinforcement, only if the slab is on his drawings.
- Shear wall nailing, before the membrane.
- Framing: beams, posts, connections, hold-downs, before insulation.
- Final Schedule C-B letter.
Plus special items he designed: retaining walls, steel beams, large cantilevers. Foam, poly and radiant are not his reviews; the City checks them.
Geotechnical engineer
Soil, bearing and excavation.
- Soil report for the design and Schedule B.
- Excavation bottom and bearing soil review, before footing forms.
- Shoring and excavation slope review, if needed.
- Under-slab gravel compaction, only if his report asks for it.
- Backfill or retaining wall reviews, if in his report.
- Final Schedule C-B letter.
Ask for his list of required field reviews and fee per visit too. Add them to the ledger.
Energy advisor
Targets, airtightness strategy and blower door tests.
Design stage
- Energy model aiming for Step 4 or 5; confirm Vancouver’s current minimum (Vancouver has its own Building By-law).
- Targets in writing: airtightness (ACH50), wall, roof and under-slab insulation, windows, heat pump, HRV, hot water.
- Window specs from the model. No window order until he checks the quote matches.
- Air barrier plan: where it is, and the details at sill, rim joists, roof joint and windows.
- Trade-by-trade sealing list to pass to each trade: framer (sill gasket, rim joists, taped sheathing), window installer (low-expansion foam and tape), electrician (airtight boxes, sealed holes), plumber and HVAC (sealed penetrations), insulation (vapour barrier taped).
- Energy compliance report for the building permit.
Mid-construction test (before drywall)
- Blower door test with you walking the house with him.
- He shows the leaks: smoke pencil (smoke pulled into leaks under suction), fog machine (fog escapes outside under pressure), thermal camera (cold or warm streaks), hand or air-speed meter.
- Mark each leak with tape; the trade fixes it; retest if needed.
Final
- Final blower door test (City notified first), final energy report and label.
Building envelope strategy
Who to ask, how many air barriers, which wrap.
Who to consult
- Energy advisor: always.
- Building envelope consultant or Passive House designer (CPHD): a few hours of detail review on the first Step 4–5 houses, especially decks over living space, roof-to-wall joints, windows and offsets.
- After 2–3 houses with the same details, do it yourself.
Air barriers
- Code needs one continuous air barrier. Continuity matters most.
- Step 4–5 good practice: two. Primary outside (taped sheathing or taped wrap, few holes); secondary inside (sealed poly, also the vapour barrier).
- Rule: the outside layer must be vapour-open. A non-breathable membrane outside plus poly inside traps moisture and causes rot.
House wrap
| Tyvek | SIGA Majvest | Soprema Sopraseal Stick VP | |
|---|---|---|---|
| Installed | Stapled, taped seams | Stapled, SIGA tapes | Fully stuck to sheathing |
| Airtightness | Good with care | Very good | Best |
| Cost | Lowest | Higher | Highest |
| Install needs | Easy | Easy; tapes need care | Primer often; dry sheathing, right temperature, skilled crew |
Suggested for Step 4–5: taped sheathing as primary air barrier, vapour-open wrap (SIGA or similar) over it, sealed poly inside as backup. Use one brand’s own tapes, primers and flashings; check stucco compatibility (stucco usually needs two layers).
Who installs
- Give membrane, rainscreen strapping, head flashings and cladding to one trade (siding or stucco contractor).
- Framer installs the windows and exterior doors with their sill pans and air sealing. Write down where the framer’s work stops and the cladding trade’s work starts at each window.
Site security: opening and closing
You are responsible overall; one named trade does it each day.
- As general (prime) contractor, site security is your responsibility; your builder’s risk insurance may also require it. Check your policy’s conditions.
- For each phase, name one lead trade in writing who opens and closes the site (for example the excavator, then the framer, then the drywaller).
- Last trade out locks up: gate, doors, windows, lights off, heaters and tools off.
- Lockbox with a code for keys; change the code at each phase and when a trade finishes.
- A “site closed” message in the site group chat at the end of each day.
- Surveillance cameras: an option for the owner at extra cost, written into the owner contract. If chosen, install once materials and windows are on site, with “site monitored” signs.
- Deliveries only when someone is there to receive and check them.
- Trades are responsible for their own tools; nothing of value left outside.
Who opens and closes, by phase
| Phase | Lead trade (opens and closes) |
|---|---|
| Hazmat removal | Abatement contractor |
| Demolition and excavation | Demolition / excavation contractor |
| Footings and foundation walls | Forming crew |
| Framing, roof, dry-in, slab | Framer |
| Rough-ins | Plumber |
| Insulation and drywall | Drywaller |
| Interior finishing | Finish carpenter |
| Handover | You; lockbox code changed for the owner |
On days the lead trade is not there: the first trade in opens, the last trade out closes and posts “site closed” in the group chat.
Homeowner agreement: your role and theirs
Clauses to include in every owner contract.
Your role
- “The Contractor manages the project through planning, scheduling, coordination of trades, inspections and site visits as the Contractor considers necessary. The Contractor does not provide full-time supervision on site.”
- Trades bring their issues to you; you bring issues to the owner.
Owner’s role
- “All instructions to trades and suppliers are given only by the Contractor. The Owner will not direct, instruct or discuss work or changes with trades.”
- “The Owner will not hire anyone for work on the property during construction without the Contractor’s written approval.”
- “Owner site visits by appointment with the Contractor, with safety gear.”
- “Changes only by a written change order signed by both parties, with price and time.”
- “The Owner pays trades and suppliers only through the Contractor: the Owner writes cheques made out to each trade or supplier and gives them to the Contractor, who delivers them. The Owner will not pay or deal with any trade directly.”
- “Any request for work in the house goes to the Contractor, who passes it to the trades.”
- “Optional: surveillance cameras during construction, at an extra cost of $____. Owner to choose: Yes / No.”
- “Optional: irrigation system, at an extra cost of $____. Landscaping design is chosen by the Owner.”
- “The Contractor may place its company sign on the site during construction.”
Schedule and price changes
- “Estimated completion: ____ months from the start of work. Completion may vary by 2 to 3 months, more or less, because of weather, permits, inspections, utility connections, supply delays and owner changes. The Contractor is not responsible for delays outside its control.”
- “Prices of materials and trade services may change during construction. Increases and decreases are passed on at cost. The Contractor will notify the Owner in writing, with the supplier’s or trade’s notice or invoice, before the cost is charged.”
Your rights if things go wrong
- Remove a trade: “The Contractor may remove and replace any trade or supplier whose work, conduct, safety or attendance is unsatisfactory, including one the Owner suggested.”
- Owner’s own workers: “If the Owner hires anyone without the Contractor’s written approval, the Contractor is not responsible for that work, any damage or delay it causes, or its warranty.”
- Owner going around you: “If the Owner instructs trades directly or ignores the Contractor’s instructions, the Contractor may give written notice. If not corrected within 5 days, the Contractor may suspend the work or end the contract.”
- Ending the contract: “If the contract ends, the Owner pays for all work done, materials ordered, the Contractor’s fee earned to date and removal costs. The Contractor hands over permits, drawings, reports and trade contacts.”
Warranty: a new home in BC must have home warranty insurance, so you cannot simply refuse to warranty the house. You can exclude work done by the owner’s own people and damage it causes. Before ending a contract, call your warranty provider and BC Housing about what happens to the enrolment. Because these clauses carry real risk, have a lawyer review them once.
With trades: ask each one for a fixed price for the whole job, or a quote valid for the full schedule, so surprises like a mid-job drywall increase do not reach the owner.
With cheques made out to the trades, keep every subcontract signed between Xerox Builders and the trade, so the trades still work for you and your warranty, holdback and removal rights stay in force.
BC lien holdback: the owner keeps back 10% of each payment, and you keep back 10% from each trade, released after the holdback period. Keep it in a separate account.
Even with few visits, WorkSafeBC still holds the prime contractor responsible for coordinating site safety. Name a lead person on site for each phase and keep the safety paperwork current.
Demolition, removal and excavation contractor
One contractor, one fixed price, a graded lot at the end.
Contract terms
- Fixed lump-sum price for demolition, removal, excavation, backfill and grading. He visits the site and reviews the drawings and geotech report before pricing.
- All truckloads are included. No extra charge for 1, 2 or 10 more loads hauled away.
- Extras by written change order only: any extra gravel, sand, fill or work needs your written approval with the price before it is delivered or done.
- Graded lot at the end: ground sloping away from the house, ready for the landscaper.
- Drain locations: he moves drain and downpipe connections to match where the roofer puts the downpipes, included in the price.
- All trips included; questions in advance; instructions only from you.
Before he starts
- Hazmat reports accepted and demolition permit on site.
- Services confirmed disconnected and capped.
- Toilet, fence, tree protection and erosion control in place.
- BC One Call request to locate buried utilities before digging.
- Scan for a buried oil tank (common in older Vancouver houses). If found, it is removed under its own permit before demolition.
- Insurance certificate and WorkSafeBC clearance letter. WorkSafeBC Notice of Project if the excavation is deeper than 1.2 m and workers will go in.
Demolition and removal
- Recycling plan and receipts for the City.
- Dust control with water; protect trees, neighbours and sidewalk; clean the street.
- Old foundation, footings and slab fully removed.
Excavation
- Dig to the surveyor’s stakes and the depth on the drawings; keep the bottom undisturbed.
- Safe slopes or shoring as the geotech requires.
- Pumps ready for rain; agreed location for the soil pile.
- Geotech review before footing forms.
Backfill and grading
- Backfill only after drain tile and damp-proofing are inspected and the main floor deck is framed.
- Compact in layers; protect drain tile, damp-proofing and dimple board.
- Final graded lot handed over, sloping away from the house.
Fixed prices usually exclude truly hidden conditions (contaminated soil, buried tanks, rock). Find them before pricing: oil tank scan, geotech report, and the hazmat survey.
Framer
Structure, temporary works, back framing and repairs. One price, all trips included.
Contract terms
- All trips are included in the price. No extra charge and no complaints about the number of visits: back framing, repairs after rough-ins, inspection fixes, temporary works, return visits of any kind.
- Framer deals with the lumber supplier directly: orders from the approved takeoff, schedules deliveries, checks each delivery and fixes shortages. Waiting for material is the framer’s problem, not yours. You approve the takeoff and any extra orders.
- Questions come in advance and in writing. Anything structural or engineering goes to you; you check with the structural engineer or architect and give one answer. No structural changes on site without your written OK.
- Framer keeps you updated on progress and on anything that could cause a delay.
- Problem-solving drops are included: any drop, bulkhead or lowered ceiling needed during construction to hide pipes, ducts or other site issues is part of the framing price.
- Planned decorative drops (feature ceilings around the house) are shown to the framer beforehand and priced before work starts.
- Extra work outside the scope gets a fixed price each time, approved by you in writing before it starts.
Temporary works (framer’s job)
- Temporary stairs with handrails to every level, safe for inspectors and trades, kept in place until the permanent stairs are in.
- Safe way in and out of the house at all times: ramps or steps at the entrance, clear path.
- Guardrails at floor edges, stair openings, and window openings low to the floor.
- Covers over floor openings, secured and marked.
- Roof anchors for fall protection; ladders tied off and extending above the landing.
- Temporary bracing of walls and trusses.
- Tarps to protect the deck and lumber from rain.
Framing scope
- Sill gasket, plates, floors, walls, beams and posts per the drawings.
- Shear walls with the exact nailing pattern; hold-downs.
- Rough stairs and fire blocking.
- Backing per your backing plan (locations and heights given before insulation): mudroom lockers, storage shelving, gym mirrors and equipment, theater screen and projector, bathroom accessories (towel bars, paper holders, grab bars, shower glass, vanities, mirrors), TVs, speakers and sound systems, cabinets, handrails, heavy fixtures, closet rods and shelves, blinds and curtain rods. Photos with measurements before drywall.
- In-wall toilet walls: framed to the depth the carrier needs (usually 2×6 or deeper), with backing.
- Hose hanger backing beside each hose bib, so a hose hanger or reel can be mounted through the cladding.
- Deck edge build-out (layers of 2×4 to the height on the drawings) for the Hardie fascia.
- Door rough openings framed to the door supplier’s sizes. If an opening is too big, the framer fixes it with blocking before drywall, at no charge.
- Trusses per the supplier’s layout; roof and wall sheathing.
- Airtightness items from the energy advisor: sill gasket, sealed rim joists, taped sheathing seams.
- Back framing after the slab: basement walls, drops, bulkheads, soffits, closets.
- Repairs after rough-ins: cut joists and plates, strapping, blocking; retighten hold-downs.
- Ready and available for the engineer’s framing review and the City framing inspection; fixes deficiencies promptly.
- Daily clean-up; waste in the bin; offcuts sorted for recycling.
Windows and exterior doors (framer’s job)
- Framer installs all windows and exterior doors, big, small or heavy. You are not involved.
- Framer coordinates delivery with the window supplier, receives the windows, checks sizes against the order and checks for damage; reports problems to the supplier the same day.
- Framer moves and lifts every unit into place, including any lifting equipment needed, all in his price.
- Install per the manufacturer’s instructions and the energy advisor’s window detail: sill pan with back dam, shims, low-expansion foam, air-seal tape inside.
- One window mock-up first, for the City sheathing inspection.
- Coordinate laps with the membrane and cladding trade: membrane and sill pan before the window, head flashing over it, so water always runs outward.
- Keep the protective film on and protect frames and glass until finishing.
- Framer is responsible for leaks caused by the window installation.
Step 5 / net zero walls (option, decided at design)
- Wall type chosen with the energy advisor and envelope consultant, drawn by the designer and engineered by the structural engineer before pricing. Framer prices from those drawings.
- Option A, exterior insulation: 2×6 wall, taped sheathing, vapour-open membrane, 2–4 inch mineral wool outside, rainscreen strapping. Keeps the sheathing warm and dry; well suited to Vancouver’s wet climate.
- Option B, double stud wall: structural outer wall plus inner 2×4 wall with a gap, filled with dense-pack cellulose or batts. Inner wall can be the service cavity. Needs careful moisture design; the outer sheathing runs colder.
- Service cavity: a 2×4 or strapping layer inside the air/vapour layer so wires and boxes never pierce it. Don’t add a third wall on top of a double stud wall.
- Choose one approach, not both. Ask the designer how the extra wall thickness affects floor area.
- Deep window openings: window bucks and sill details from the envelope consultant.
Coordinate with the surveyor for the height survey once the roof framing is done, before roofing.
Concrete supplier
Right mix, right time, every ticket kept.
- Mix for each pour as the structural engineer specifies: strength, air-entrained mix for exterior concrete.
- Order volume with a small extra margin; confirm the pump and placer for the same time.
- Delivery times booked; truck route and parking planned.
- Cold weather: heated concrete or accelerator, and blankets ready. Rain: agreed cancellation terms.
- Keep every delivery ticket; the engineer may ask for them. Concrete tests if the engineer requires.
Concrete placer and finisher
Footings, walls, slab, driveway and flatwork.
- Fixed price per pour type; all trips included.
- Never pour before the engineer’s review and the City inspection pass.
- Everything cast in before the pour: anchor bolts, hold-downs, sleeves, and railing or glass-guard anchors on retaining walls.
- Walls vibrated properly; no honeycombing.
- Finish per the schedule: smooth trowel inside, broom finish outside, exposed aggregate where chosen.
- Slab with radiant: tubing kept under pressure during the pour; saw cuts away from radiant tubing, on time.
- Curing and protection from rain and frost.
- Washout only in the agreed spot; never into the street or storm drain.
Railings, gates and glass guards
Deck and stair railings, gates, fence, glass on retaining walls.
- Measured on site once decks, stairs and walls are built; shop drawings approved by you before ordering.
- Guard heights and strength as the code requires; designer confirms where guards are needed.
- Glass guards on a retaining wall: anchors designed by the engineer and cast into the wall by the concrete placer, or core-drilled to the engineer’s detail.
- Tempered or laminated glass as the system requires.
- Gates: hardware, latches and swing direction agreed; posts set in proper footings.
- Fence height within the City’s limits; check before ordering.
- Order early: railing and glass lead times are often several weeks.
Slopes: no water puddle anywhere
Showers, decks and roofs. Built into the framing, checked before anything covers it.
Who does what
- Designer: slope arrows and drain locations on every shower, deck and low-slope roof on the drawings.
- Framer: builds the slope into the structure (tapered joists, sloped sleepers or recessed floor). The slope never depends on the membrane or tile.
- Membrane installer, roofer, tile setter: check the slope before starting. If it is not there, they stop and call you; they do not cover it.
Targets (designer confirms)
- Showers: about 1/4 inch per foot to the drain. Curbless or walk-in showers: floor recessed at framing, decided at design. Waterproofing with the Schluter Kerdi system and a 24-hour flood test before tile. Curbless shower in the primary bathroom (floor recessed at framing).
- Decks: at least 2% (about 1/4 inch per foot) to the drain or edge, framed in.
- Low-slope and flat roofs: at least 2% to drains or scuppers, by framing or tapered insulation; crickets behind chimneys and walls; overflow scuppers.
Your hold point
- Before any membrane or tile: check with a 4-foot level, then pour a bucket of water. It must all run to the drain. Photo it.
- Before handover: hose test on every deck and low roof; flood test in every shower.
Gutters
- Exterior hung gutters with downpipes are the practical choice: cheaper, easy to clean, and if they fail the water stays outside the house.
- Built-in gutters look clean but sit inside the building; a leak there rots the structure. Use them only where the design really needs them, lined by the roofer’s membrane, sloped, with an overflow, and the detail reviewed by the envelope consultant.
- Downpipe locations decided at roof stage and given to the excavator for the drain connections.
Decks and deck edges
Waterproof, drained, and a clean deep edge.
Who decides, and when
- Designer, at design stage: deck edge height, look and the drip detail on the elevations and sections. It affects door thresholds and drainage.
- Structural engineer only if the build-out is large or the deck is over living space.
- Talk it through with the framer, deck membrane installer and cladding trade at airtightness meeting 1, before framing.
Build
- Framer builds out the edge (3–5 layers of 2×4) and the slope for drainage.
- Deck membrane wrapped over the edge, with a metal drip flashing at the bottom so water drips clear instead of streaking down the wall.
- Cladding trade installs James Hardie trim on the fascia, following Hardie’s clearance and flashing rules.
- Deck over living space: insulation, membrane, drains and fire separation as drawn (see Part 0).
Deck finish (decide at design)
| Finish | Good for | Watch out |
|---|---|---|
| Vinyl membrane (Duradek type) | Decks over living space; walkable, waterproof in one layer; common in BC | Certified installer for the warranty; seams welded; scuffs and dents |
| Liquid coating (epoxy, polyurethane) | Small decks and odd shapes; seamless | Needs dry weather to apply; recoating over time; can crack if the deck moves |
| Pavers on pedestals over a membrane | Premium look, long life; membrane protected from sun and wear | Highest cost; needs extra height (plan door thresholds) |
| Composite or wood on sleepers over a membrane | Warm look over living space | Membrane must still be fully waterproof underneath |
| Composite or cedar (no living space below) | Open decks; simple | Not waterproof; only where water may drain through |
- Slope to drains or edge as the product requires; drains and scuppers on the drawings.
- Membrane turned up the walls and under the door sill pans, per the manufacturer.
- Guard posts mounted on the fascia where possible, so posts do not pierce the membrane.
- Ask for the manufacturer’s warranty in writing, with the installer’s certification.
Shower doors and glass
Measured after tile, installed near the end.
- Style chosen with the owner early; framer adds backing where hinges and brackets go.
- Glass company measures after the tile is finished, not before.
- Installed after the plumber’s finishing; silicone joints done by the glass company and allowed to cure.
- Mirrors can be measured and installed by the same company.
Finish carpenter
Doors, trim, stairs and closets.
- Solid-core doors throughout the house.
- Concealed hinges on doors.
- Framer adds solid backing where concealed hinges and heavy doors need it.
- Gaps around door jambs: jambs shimmed solid at hinges and latch; gaps over the normal size filled with blocking, extension jambs or wider casing. Exterior door gaps sealed with low-expansion foam or backer rod for airtightness. If the cause is a wrong rough opening, the framer pays for the fix.
- Trim, stairs and railings, closets per the finish schedule.
- Seals on laundry and mechanical room doors (sound control).
- All trips included; instructions only from you.
Electrician
Lighting plan agreed first; unit prices for every add or change.
Contract terms
- Lighting and switch plan walked and agreed before rough-in (after drops are framed).
- Any number of 3-way and 4-way switch locations on the plan is included; the switching layout follows how people walk through the house.
- Electrician installs all fixtures, including chandeliers, whether supplied by you or the owner. Framer adds backing and a rated box for every heavy fixture.
- Unit price list in the subcontract for adds and deletes: wafer/pot light, pendant, chandelier, step light, bedside sconce, exterior sensor light, exterior plug, exterior switch, landscape-light wire, fence-light wire, EV charger, data point.
- All trips included; instructions only from you.
Scope
- Step lights and bedside lights per the plan.
- Network pre-wire (standard): data point in every bedroom, ceiling Wi-Fi access points, a network cabinet with power, outside camera wiring.
- Exterior sensor lights: number and locations marked on the plan.
- Exterior plugs and switches on all sides as planned.
- Wires left outside for landscape and fence lights, marked and capped; trench photos.
- Motorized roller shades: power (or low-voltage wire) at each window head per the shade supplier’s wiring sheet; wall switch or keypad locations; space for the control hub. Framer adds backing and any recessed shade pockets at the window heads.
- Airtight boxes and sealed holes through the air barrier; EPDM gaskets on every wire, conduit and fixture penetration; outlet for the future radon fan.
- BC Hydro service conduit, garage or laneway feed; EV charger circuit and solar conduit from the panel to the roof on every house (company standard).
- Temporary power post with its permit, at the start of the job.
Plumber
Good water pressure and quiet drains.
Water supply and pressure
- Water service size calculated by the plumber and sprinkler designer for all fixtures plus sprinklers (often larger than a basic house needs). Don’t guess the size.
- Pressure-reducing valve set near the top of the code limit, not low, so showers and baths have strong flow.
- Large enough mains and a manifold (home-run) system so one tap does not starve another.
- Frost-free hose bibs on all four sides of the house.
- Showerheads and taps must still meet code flow limits; pick good-quality fixtures that feel strong within them.
- Frost-free hose bibs, so they never need shutting off in winter.
- Leak protection (standard): automatic main water shut-off valve with leak sensors at the laundry, water heater, under sinks and in the mechanical room.
- In-wall toilets: carrier installed to the manufacturer’s sheet; access for the flush plate; framer builds the deeper wall.
- Plumbing fixtures supply: fixture list with models agreed before rough-in (valves depend on the model); who orders each item written down (plumber or you), with delivery dates.
- EPDM gaskets on every vent and pipe penetration through the air barrier and the exterior membrane.
Quiet drains
- Cast iron vertical stacks (or sound-rated drain pipe) for toilets and showers.
- Rubber-isolated pipe clamps; pipes never touching drywall or framing hard.
- Mineral wool around stacks and in bathroom walls and ceilings.
- Keep stacks out of bedroom walls where the design allows.
Also
- Under-slab drains, radon pipe, rainwater tank, drain tile under his permit, trenches (see Trenches).
- Temporary water by hose before the house water is cut.
Fire protection (drywall and exterior)
Every fire-rated area built exactly as drawn.
- Designer marks every fire-rated wall, ceiling and exterior wall on the drawings; drywall and exterior trades price from them.
- Garage-to-house walls and ceiling, suite separations, mechanical room if required: Type X drywall, layers and screws as the rated assembly says.
- Two-layer assemblies: joints staggered between layers; all joints taped.
- Exterior walls close to the property line: DensGlass (gypsum) sheathing and non-combustible cladding, soffit protection, as drawn.
- Every pipe, wire and duct through a rated wall or ceiling sealed with fire caulk (approved firestop).
- Fire blocking at floors and openings (framer).
- Photos of each rated assembly before it is covered.
Stucco
Proper curing between coats, checked before the next coat.
- Membrane layers, flashings, weep screed and rainscreen as drawn before the first coat.
- Enough curing days between coats, per the manufacturer. Typical: scratch coat kept damp at least 48 hours before the brown coat; brown coat about 7 days before the finish coat; longer in cold or wet weather.
- Check each coat before the next: scratch with a key or nail (should not powder), tap for hollow sounds (no loose areas), even colour (fully cured), no large cracks; scratch coat has proper grooves for the next coat.
- Protection from rain and frost while curing.
- Leave on site at the end: a bucket of the finish stucco and paint (liquid) with the colour name, for touch-ups later.
- Tall exposed concrete: rainscreen strapping fastened to the concrete with a powder-actuated gun, then stucco carried down, leaving only about 6 inches of concrete showing, while keeping the code clearance above finished grade. Designer confirms the detail.
Damp-proofing and dimple board
One specialized company with the drain tile.
- Concrete clean and dry; damp-proofing coat on the full wall below grade.
- Dimple board dimples against the wall, laps overlapped and sealed.
- Top of the dimple board sealed to the concrete with a finishing strip and sealant, so water cannot run behind it toward the foundation.
- Bottom of the dimple board running into the drain rock over the drain tile.
- Drain tile inspected (plumbing permit) before backfill; backfill protects the board.
Final sealing before handover
One caulking walk through the whole house, the right product in the right place.
| Where | Product | Who |
|---|---|---|
| Painted trim, baseboards, casings, drywall gaps | Paintable acrylic caulk (DAP type) | Painter |
| Tubs, showers, sinks, counters, backsplash | 100% silicone, mildew-resistant, colour matched (not paintable) | Tiler or plumber |
| Windows, doors and penetrations outside | Exterior-grade sealant made for the cladding | Cladding trade |
| Concrete joints, driveway, steps | Polyurethane or hybrid joint sealant | Concrete finisher |
- Walk every room with a tape roll; mark every missed or messy joint.
- Old or dirty caulk removed before re-caulking; clean, straight lines.
- Let silicone cure before the owner uses showers and tubs.
HVAC: heat pump, AC and HRV
Two machines, two jobs: the heat pump heats and cools; the HRV brings in fresh air.
Who designs it: an independent designer, not the installer
- Hire an independent HVAC designer (in BC usually TECA-certified for heat loss/gain and ventilation design), or a mechanical engineer for larger houses. Some energy advisors offer this too. He does not install, so he has no reason to cut corners.
- He delivers: room-by-room heat loss and heat gain calculation, equipment sizes, duct sizes and routes, every vent location, separate HRV ducting, airflow for each room.
- The installer prices to that design and may not change it (no shared HRV/AC vents, no smaller ducts) without the designer’s and your written OK.
- Designer checks the installation once before drywall and reviews the final balancing report.
- Decide the system at design stage, before framing: duct routes decide your drops and bulkheads.
- Cost: usually small compared with the equipment. Get 2–3 quotes for the design alone.
Choosing quiet, right-sized equipment
- Right size, not oversized. Oversized units switch on and off, are noisier and control humidity badly. The calculation decides the size.
- Variable-speed (inverter) heat pump; air handler with a variable-speed (ECM) fan.
- Compare the sound rating (dB) of outdoor units and the sone rating of the HRV before buying.
- Larger, low-speed ducts are quieter; designer sets the maximum air speed.
- Outdoor unit location and noise within the City’s rules near property lines; check before the permit.
- High-efficiency HRV as the energy model requires.
Two ways to duct the HRV
| Separate HRV ducts | HRV connected into the heat pump ducts | |
|---|---|---|
| How | HRV has its own supply vents (bedrooms, living) and its own exhaust (bathrooms, kitchen, laundry) | HRV fresh air goes into the heat pump’s return duct and shares its supply vents |
| Vents seen | More vents | Fewer vents |
| Performance | Best fresh air in every room; preferred for Step 4–5 | Works only when the heat pump fan runs, often all day at low speed (more power use) |
| Balancing | Simpler | Harder; designer must allow it |
Hiding the vents
- Linear slot diffusers along the ceiling edge or in a drop: look like a thin line, not a grille.
- High wall vents on the side of a drop or bulkhead.
- Floor or toe-kick vents under cabinets for heat pump supply where suitable.
- Returns grouped in hallways or closets, not in every room.
- Plan all ceiling items together on one ceiling plan: vents, lights, sprinklers, speakers, smoke alarms, lined up neatly.
Bedroom-by-bedroom temperature control
- Goal: each bedroom sets its own temperature without changing the rest of the house. Decide at design; much harder to add later.
- Option 1, split heads in each bedroom (multi-zone heat pump): simple control per room. Watch out: in an airtight Step 4–5 house a bedroom needs very little heating or cooling, often less than the smallest head, so it switches on and off and wastes power. Wall heads are visible; ceiling cassettes or slim ducted units hidden in a drop look cleaner.
- Option 2, zoned ducted system: one ducted heat pump with motorized dampers and a thermostat in each bedroom or zone. No units on the walls.
- The HVAC designer picks the option and sizes it from the room-by-room calculation.
- If heads may be added later: rough in the refrigerant line sets, condensate drains, power and backing now, capped and photographed.
- Outdoor units: number, location and noise checked against City rules; condensate drains planned for every indoor unit.
HVAC installer checklist
- Install exactly per the designer’s layout; no moving vents without your OK.
- Ducts sealed (mastic or tape); EPDM gaskets where ducts and line sets pass the air barrier.
- HRV and air handler on vibration isolators with flexible connectors (sound control).
- HRV balanced at the end with a written report; the energy advisor and City may ask for it.
- Filters, manuals and settings explained at handover.
Handover and owner maintenance
The owner keeps the warranty by maintaining the house.
Handover day
- Professional final clean done; final walk-through with the owner; deficiency list signed with dates to fix; keys and lockbox code handed over.
Give the owner
- The home warranty documents and the warranty provider’s maintenance guide.
- A maintenance schedule: HRV filters, heat pump service, gutter cleaning, caulking and stucco checks, deck membrane checks, leak sensor batteries, radon test.
- Manuals and warranties for every appliance and system; trade contact list.
Clauses for the owner agreement and handover letter
- “The Owner is responsible for regular maintenance of the home as set out in the maintenance schedule and the warranty provider’s guide.”
- “Damage caused by lack of maintenance is not covered, and may affect the home warranty.”
- “Alterations, additions or work done without permits or by others after handover are the Owner’s responsibility; damage they cause is not covered and may affect the home warranty.”
What the home warranty covers or excludes is set by the warranty provider’s policy. Point the owner to those exclusions in writing at handover, and have them sign that they received the maintenance schedule.
Gas and fireplaces
Decide at design: all-electric, or gas for a few items only.
Vancouver rules (check each new project)
- Vancouver’s gas rules have changed several times. As of early 2025, gas was still allowed for cooking and fireplaces, while heating and hot water must meet strict carbon limits (in practice electric). Confirm with the designer and energy advisor before design; questions: green.buildings@vancouver.ca.
How many gas connections
- If gas is used: typically cooktop or range, fireplace(s), outdoor BBQ outlet, maybe a fire table. Each needs a gas line, and the house needs a FortisBC service and meter.
- If gas would only serve a fireplace or BBQ, consider all-electric: no gas service cost, no monthly charge, simpler and more airtight.
Gas and airtightness
- Gas fireplace: only sealed direct-vent units (take outside air, exhaust outside). Vent penetration sealed into the air barrier.
- Gas range: burns inside the house. Needs a good range hood vented outside; large hoods may need make-up air, which the HVAC designer checks.
- Carbon monoxide alarms wherever there is a fuel-burning appliance or an attached garage.
Fireplace choice
| Electric (recommended) | Gas direct-vent | |
|---|---|---|
| Install | Easy, anywhere, just a circuit | Gas line, vent through the wall, gas permit |
| Airtightness | No effect | Vent hole to seal |
| Safety | No combustion, no CO | Combustion; yearly service |
| Heat | Modest, comfortable | Strong; can overheat an airtight Step 4–5 house |
| Looks | Many modern designs, realistic flames | Real flame |
- Electric fireplace needs: dedicated circuit, backing and the framed opening to the unit’s sheet, TV-above clearances per the manufacturer.
Where to put the mechanicals
Easy to service, quiet, short runs. Decide at design.
Mechanical room
- Basement or lowest floor, on the slab (less vibration), roughly central so ducts are short.
- On an outside wall, near where water, power and gas come in: short runs for HRV intake and exhaust and heat pump line sets.
- Away from bedrooms; sound-insulated walls and a solid-core door with seals.
- Door wide enough to remove the biggest unit (36 inches or wider).
- Service space in front of each unit as the manufacturer requires; electrical panel with its required clear space.
- Floor drain, light, outlets; HRV filters reachable without a ladder.
- Usually holds: air handler, HRV, water heater (a heat pump water heater needs enough room air), radiant manifold, main water shut-off and pressure valve, sprinkler riser, sump if any.
Second air handler (upper floor, if needed)
- Inside the warm, airtight part of the house (never in a cold attic), in a closet or drop with a full-size access door and a drain pan.
Washer and dryer
- Upper floor near the bedrooms is the most convenient.
- Always: drain pan with a drain, water leak sensor and automatic shut-off valve; vibration pads; sound insulation around the room.
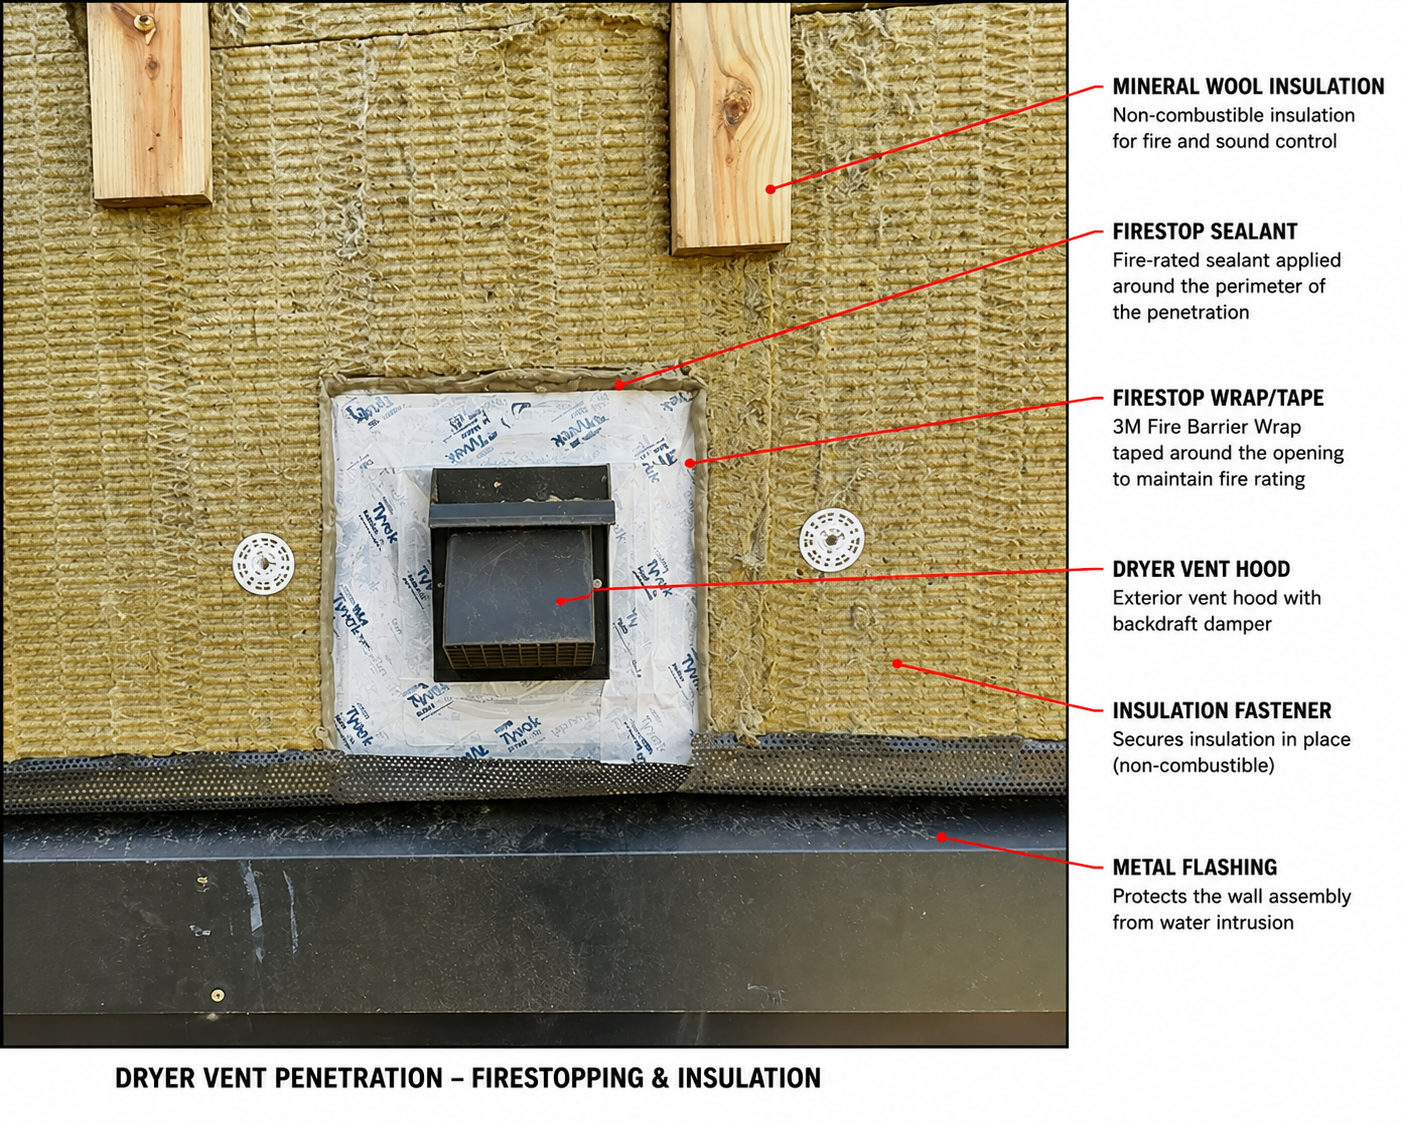
- Dryer vent short and straight to the outside, or a heat pump / condensing dryer (no vent hole in the airtight wall; good for Step 5).
Outdoor heat pump unit
- Side or back yard with service access, on a raised pad or brackets, away from bedroom windows (yours and the neighbours’), close to the air handler for a short line set; within City noise and setback rules.
Access panels
- For every valve, manifold, in-wall toilet, tub motor, junction box and shut-off that would otherwise be hidden; all shut-offs labelled.
Sound control (insulation and drywall)
Quiet bathrooms, laundry and mechanical areas.
- Sound panel, mineral wool and resilient channel around the washer and dryer, HRV, air handler and mechanical room, and around bathrooms.
- Solid-core door with seals on the laundry and mechanical room.
- Rubber vibration pads under the washer and dryer; HRV and air handler hung or set on isolators, with flexible duct connectors.
- Seal every gap and penetration in these walls with acoustic sealant.
- Plan the mechanical room and laundry away from bedrooms at design.
- Ground-floor ceiling sound assembly: see Part 13.
Basement ceiling: voices and footsteps
- Two kinds of noise: airborne (voices, TV) and impact (footsteps, the “shock” felt below). Stopping footsteps needs work on the floor above, not only the ceiling below.
- Floor above (company standard, best level), from bottom to top: stiffer joists (engineer) → thick subfloor glued and screwed → sound mat → gypsum concrete topping → high-rated acoustic underlay approved by the flooring maker → finished floor.
- Choose underlay by its tested IIC / delta-IIC rating with your floor type: higher is quieter. Tile: a tile sound mat such as Schluter Ditra-Sound. Vinyl plank: only a dense underlay the vinyl maker approves.
- Floors kept from touching walls: perimeter isolation strip, gap hidden by the baseboard, flexible caulk.
- Ceiling below: mineral wool filling the joist space, sound panel, isolation clips with hat channel (or resilient channel), two layers of 5/8″ drywall with damping compound between.
- Slim wafer lights; every gap sealed with acoustic sealant.
- No assembly is 100% silent, but these together make footsteps and voices very hard to hear.
Home theater
- Room-within-a-room: separate or staggered stud walls, isolated ceiling, double drywall with damping compound.
- Solid-core door with full seals; no shared ducts without lined bends.
- Conduit for AV cables, backing for screen, projector and in-wall speakers; dimmable lighting; dedicated circuit.
Gym
- Best on the basement slab. On an upper floor, an isolated floor with thick rubber.
- Thick rubber flooring; backing for mirrors, TV and wall equipment; extra outlets; good ventilation or cooling.
Storage room and lockers
- Backing for shelving and mudroom lockers; light, outlet and some ventilation in the storage room.
Airtightness meetings with all trades
Two short site meetings, led by you, with the energy advisor.
Meeting 1: before framing starts
- Who: framer, window installer (framer), cladding and membrane trade, roofer, energy advisor.
- Show the drawing with the air barrier marked as one continuous red line, and where each trade’s part joins the next.
- Agree the details: sill gasket, rim joists, taped sheathing, roof-to-wall joint, windows.
- Agree the approved tapes, sealants and membranes (one brand).
Meeting 2: before rough-ins
- Who: plumber, electrician, HVAC, sprinkler, low voltage, insulation, energy advisor.
- Where pipes, ducts and wires may pass through the air barrier, and how each is sealed.
- Airtight boxes, sealed penetrations, exhaust and HRV duct sealing.
- Mid-construction blower door test date announced; each trade fixes its own leaks.
Rules for working together
- You cut it, you seal it. Any trade that makes a hole in the air barrier seals it the same day, with EPDM gaskets for pipes, vents, ducts and wires.
- Tell the site group chat before cutting through the air barrier, with a photo after sealing.
- Air barrier drawing posted on site.
- Leaks found at the blower door test are fixed by the trade that made them, at no charge.
Trenches (every trade)
Every pipe, wire and conduit in the ground is planned, inspected and photographed.
- Plumber: water, sanitary, storm, rainwater tank.
- Electrician: BC Hydro underground service conduit, feed to garage or laneway house, EV charger; outlet near the future radon fan.
- Low voltage: telecom and internet conduit.
- Gas fitter / FortisBC: gas line, if any.
For every trench
- One shared trench where the rules allow; keep required separations.
- Warning tape above each line.
- Inspection before backfill.
- Photos and measurements before covering; keep them for the owner.
Engineer field review ledger
One line per visit. Print it or copy it into your project file.
| Engineer | Field review | Date called | Date visited | Letter received | Fee |
|---|---|---|---|---|---|
| Structural | Footing rebar | ||||
| Structural | Foundation walls and anchors | ||||
| Structural | Slab mesh (if on drawings) | ||||
| Structural | Shear wall nailing | ||||
| Structural | Framing | ||||
| Structural | Final C-B letter | ||||
| Geotech | Excavation and bearing soil | ||||
| Geotech | Compaction (if in report) | ||||
| Geotech | Final C-B letter |
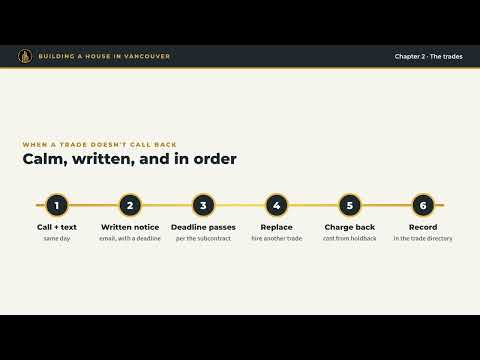
Keeping trades tied to the project
So they answer your calls if a problem comes up later.
- Written subcontract with every trade: a warranty clause (at least 2 years on workmanship), a callback response time (for example 48 hours), and your right to hire someone else and charge it back if they don’t come.
- Holdback: keep the legal 10% lien holdback; pay the final amount only after their final inspection and deficiencies are done.
- Collect before they start: insurance certificate (liability with completed operations), WorkSafeBC clearance letter, licence numbers.
- Collect at the end: a signed warranty letter.
- Use licensed trades (electrical, gas, plumbing). Their permits tie their names to your job.
- Right to remove: the subcontract lets you remove a trade for poor work, unsafe work, no-shows or ignoring your instructions, after written notice, and hire a replacement. The extra cost is charged back to the removed trade.
- Your instructions only: trades take instructions only from you, never from the owner. Owner requests go through you.
- No trip counting: every trade’s price includes all the trips needed to finish the job. They ask questions in advance and get updates when they need them, but the number of visits is never a reason for an extra charge.
- Trade directory for every house: names, phones, licence numbers, and photos of their work before it was covered.
Have a lawyer check your subcontract template once, then reuse it on every job.
Coming soon
More checklists we are adding, in build order.
- Designer or architect (permits and permit revisions during construction)
- Abatement contractor
- Drain tile company · Foam, poly and rebar crew
- Roofer · Membrane and cladding (siding or stucco) · Windows
- Sprinkler
- Insulation · Drywall with soundproofing · Exterior and interior finishers
- Site safety and WorkSafeBC (temporary stairs, guardrails, fall protection)
- Landscaper · Handover of the keys
Inspection checklist
Watch the full series
Watch in English
 Part 1Planning and Your Team
 Part 2Site Prep to Foundation
 Part 3Framing and Envelope
 Part 4Slab and House Systems
 Part 5Airtight, Quiet and Safe
 Part 6Finishing to Handover
 Part 7Bonus: Running the Job
हिंदी में देखें (Watch in Hindi)


Let us build it right, step by step
Xerox Builders builds custom homes, laneway homes, duplexes and multiplexes, following exactly this manual. Tell us about your lot and plans.

Related Posts






Recent Works